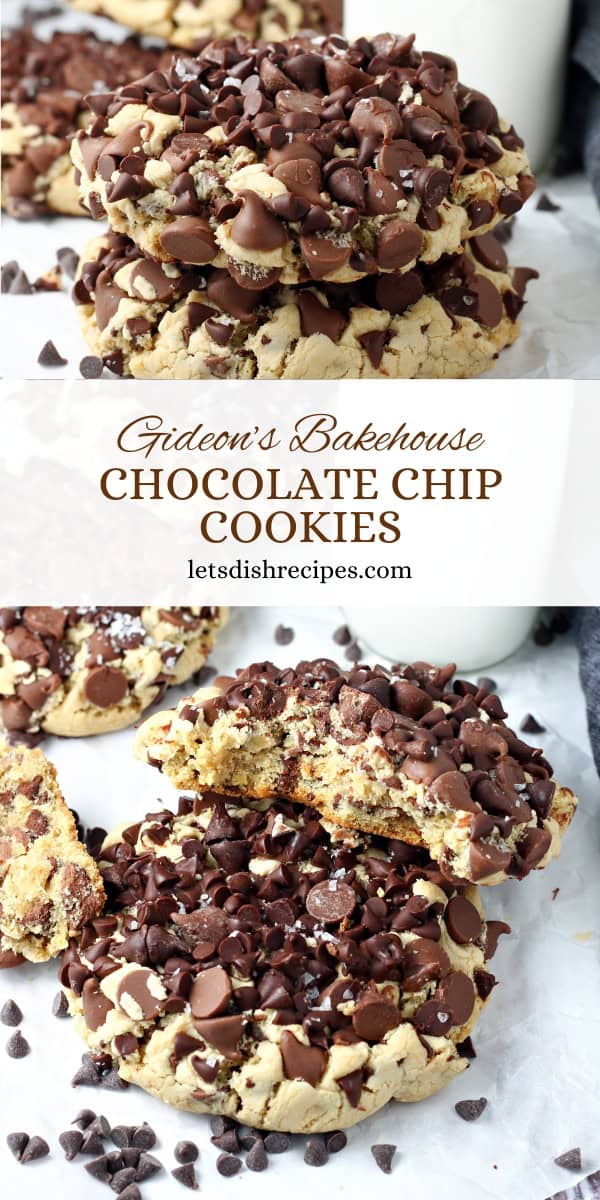
Known for their thick, soft centers and generous amount of chocolate, Gideon’s Bakehouse Chocolate Chip Cookies are a cookie-lovers dream come true. If you’re a fan of indulgent, bakery-style cookies, then you’re going to love these enormous cookies. Whether you’re baking for a special occasion or just craving a sweet treat, these cookies are sure to become a favorite.
Why You’ll Love This Recipe
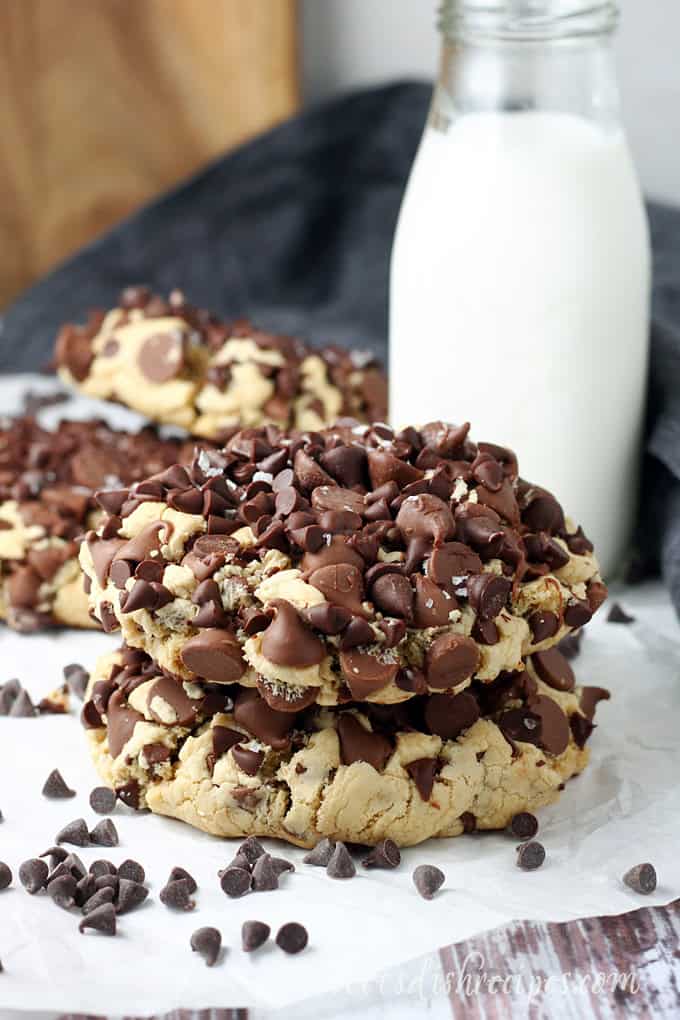
Now that you’ve seen the photos, do I even need to explain why you’ll love these chocolate chip cookies?!! Or maybe the photo doesn’t do justice to this nearly half-pound cookies that’s loaded with chocolate chips, both inside and out.
Another reason to love this recipe? There are only two Gideon’s Bakehouse locations, both in Orlando. At the location inside Disney World, people have been know to wait in lines up to five hours long!
But there’s no need to head to Florida and wait in long lines when you can recreate these wildly popular chocolate chip cookies at home–in far less than five hours!
Of course, there is always the option to chill your dough for up to 24 hours, but I find that just an hour in the refrigerator does the trick.
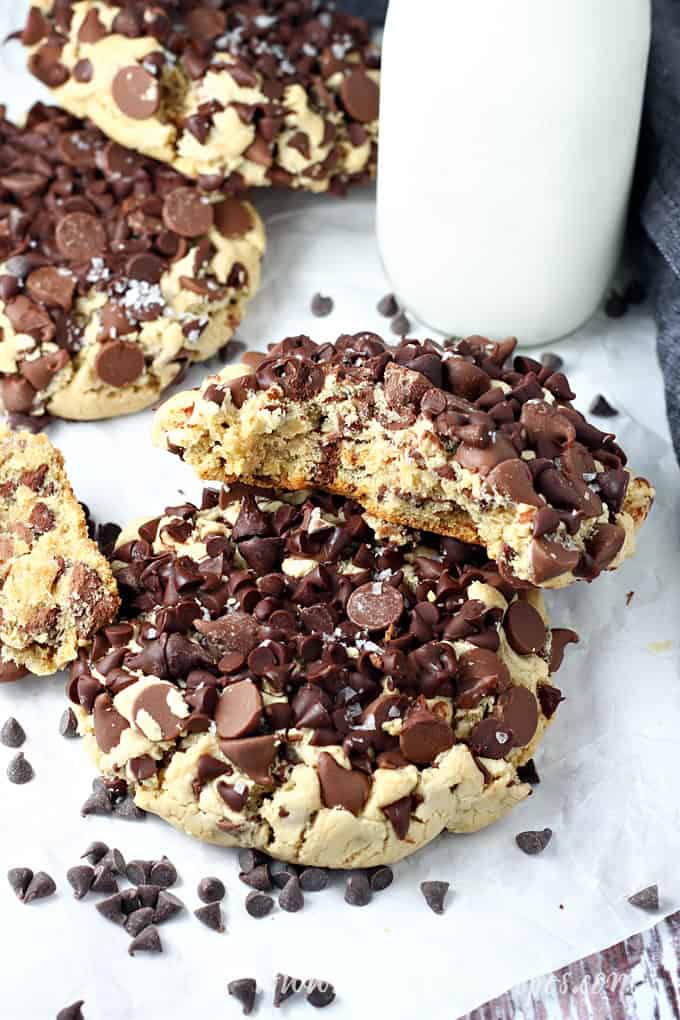
The method for this recipe may be a bit different than other cookie recipes you’ve made, but even if it seems weird, trust the process and you’ll end up with the most amazing, decadent chocolate chip cookie you’ve ever had.
The most important thing when baking these cookies–or any cookie–is not to overbake! For soft, chewy cookies, it’s always better to err on the side of underbaking.
Everyone I have shared these cookies with has raved about them. And it’s easy to see why. With all those chocolate chips, they are absolutely decadent.
I do definitely recommend sharing these cookies. Even though the recipe only yields 5-6 cookies, at nearly a half pound each, it’s pretty hard to finish one on your own.
If you’ve never tried a Gideon’s Bakehouse Chocolate Chip Cookie, you don’t need to hop on a plane and stand in line for hours. Just follow the recipe to make these famous cookies at home!
Ingredients
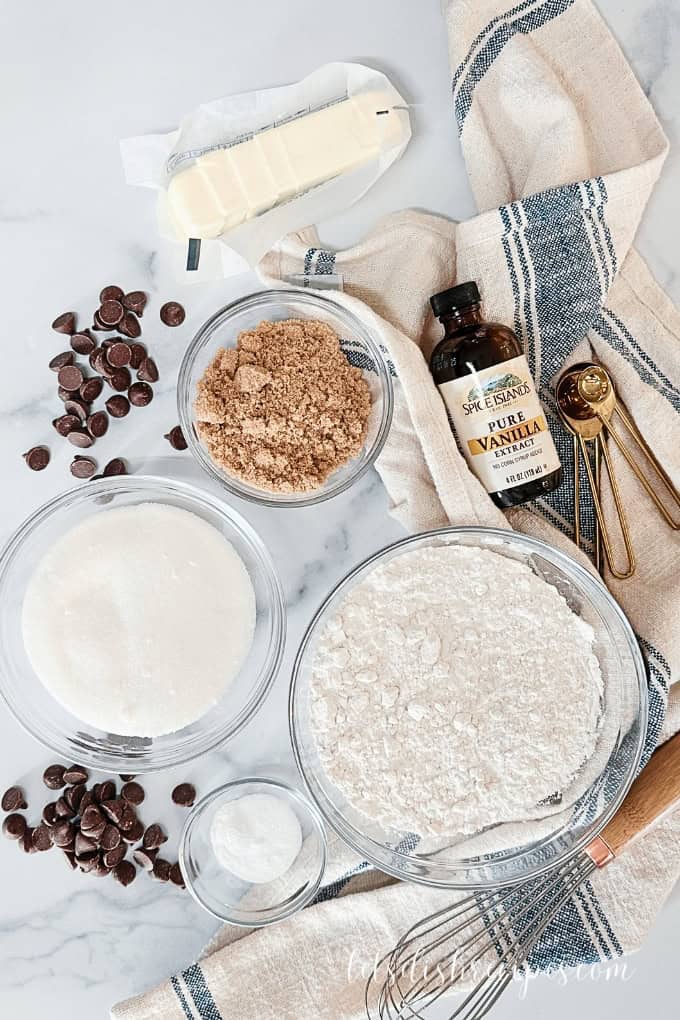
- Butter: We’re using melted butter in this recipe, which gives the cookies a super soft texture. Make sure to melt it and let it cool to room temperature before mixing – this ensures the dough comes together properly and doesn’t get too greasy.
- Brown Sugar: Packed brown sugar gives these cookies a deep, caramel-like flavor and chewy texture. I prefer to use light brown sugar. Either way, don’t skimp on packing the sugar tightly into your measuring cup!
- Vanilla: A teaspoon of vanilla extract adds warmth and enhances the sweetness of the cookies. I recommend using good quality real vanilla extract, not imitation.
- Baking Soda & Baking Powder: These ingredients give the cookies the perfect lift and spread, making them soft and thick. Be sure to use both for a true bakery-style result.
- Cornstarch: This is my secret ingredient for super soft cookies. It helps keep the cookies tender and prevents them from spreading too much while baking.
- Cake Flour and All-Purpose Flour: A mix of cake flour and all-purpose flour gives these cookies a perfect, bakery-style texture. Cake flour really does help make the cookies extra soft!
- Chocolate Chips: We’re going all-in with the chocolate chips here! Use a mix of milk or semi-sweet chocolate chips and mini chocolate chips for that signature Gideon’s look.
How to Make Gideon’s Chocolate Chip Cookies
Step 1
Prep Your Baking Sheets: Line two large baking sheets with parchment paper and set them aside. This will prevent your cookies from sticking and make cleanup a breeze–especially with all those chocolate chips.
Step 2
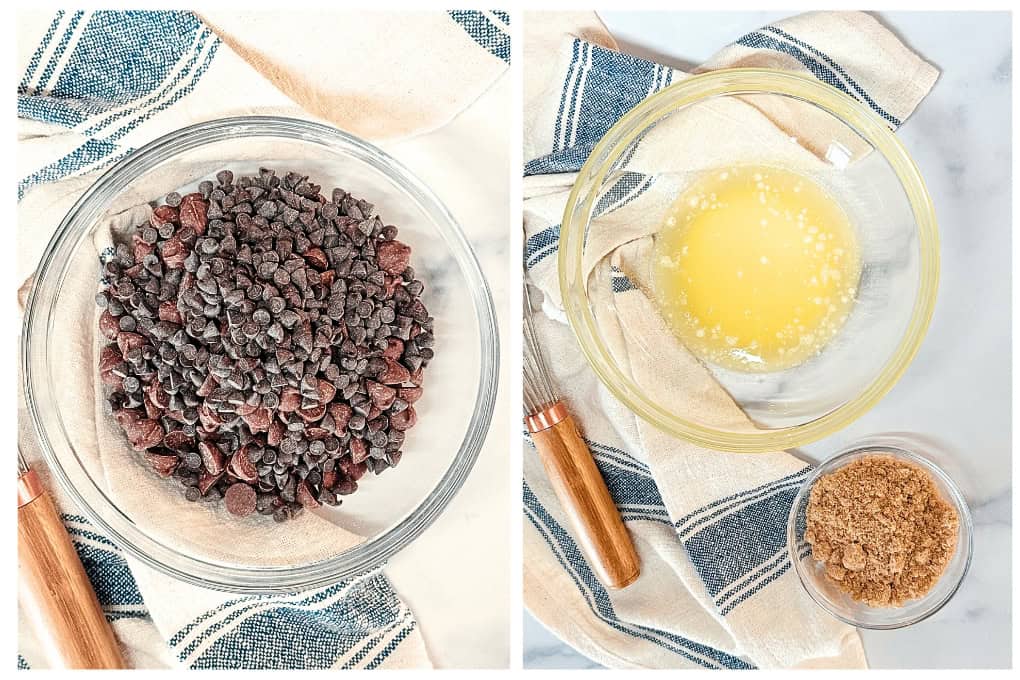
Combine the Chocolate Chips: In a medium bowl, mix together all of the chocolate chips. Set this aside – we’ll fold these into the dough later, and press some onto the outside of the cookies.
Step 3
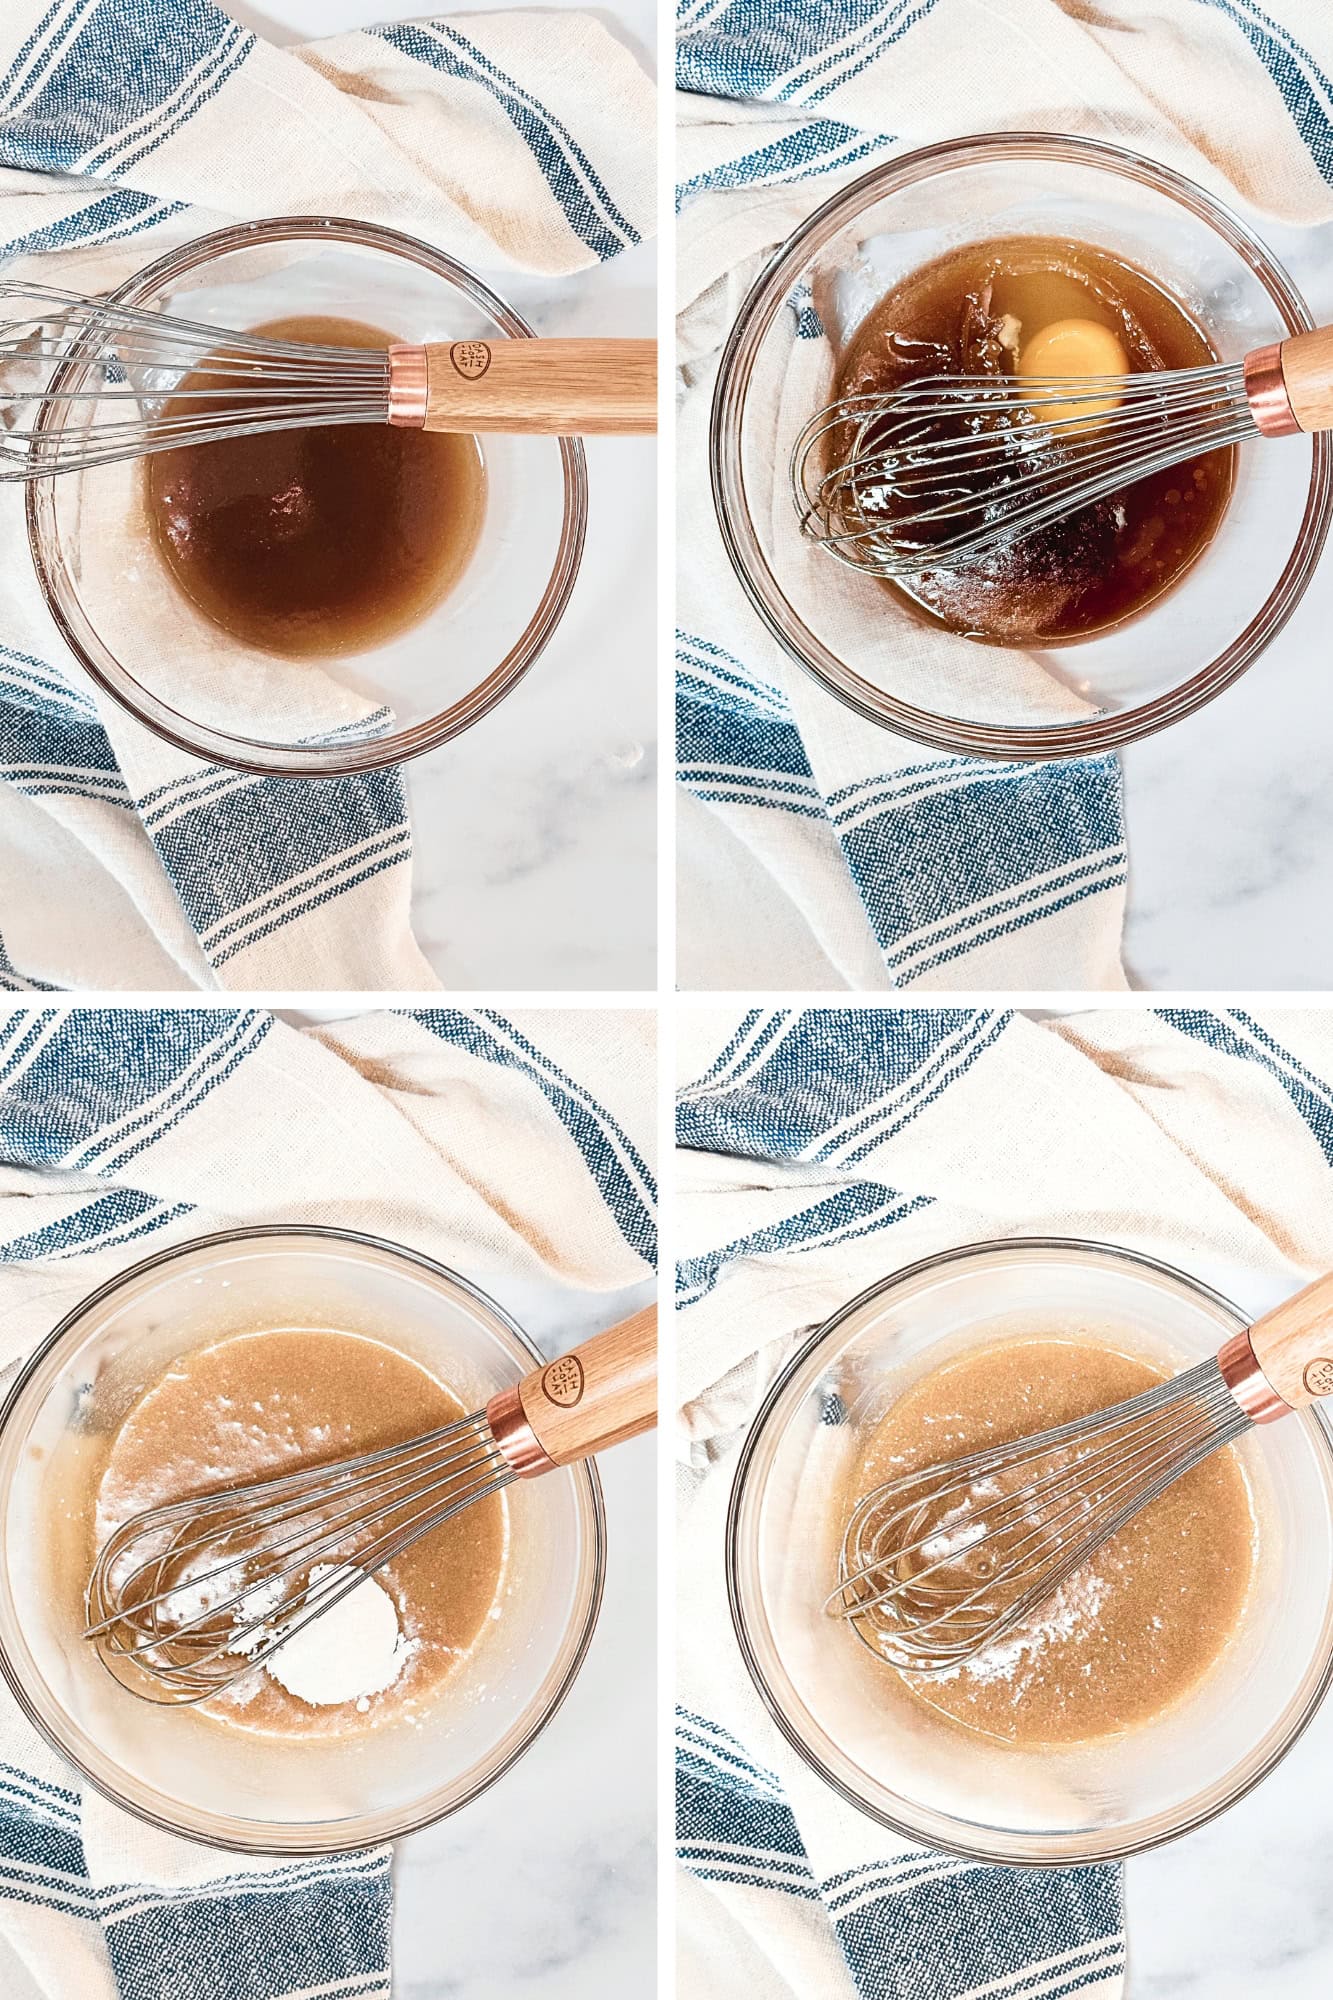
Melt the Butter: In a large, microwave-safe bowl, melt the butter. Let it cool to room temperature for about 10 minutes. This ensures the butter mixes smoothly without affecting the texture of the cookies.
Step 4
Mix the Wet Ingredients: Once the butter is cool, whisk in the brown sugar until the mixture is smooth and free of lumps. Then stir in the egg and vanilla until everything is well combined.
Step 5
Add the Dry Ingredients: Stir in the baking soda, baking powder, cornstarch, and salt. Next, fold in the cake flour followed by the all-purpose flour. Stir just until combined.
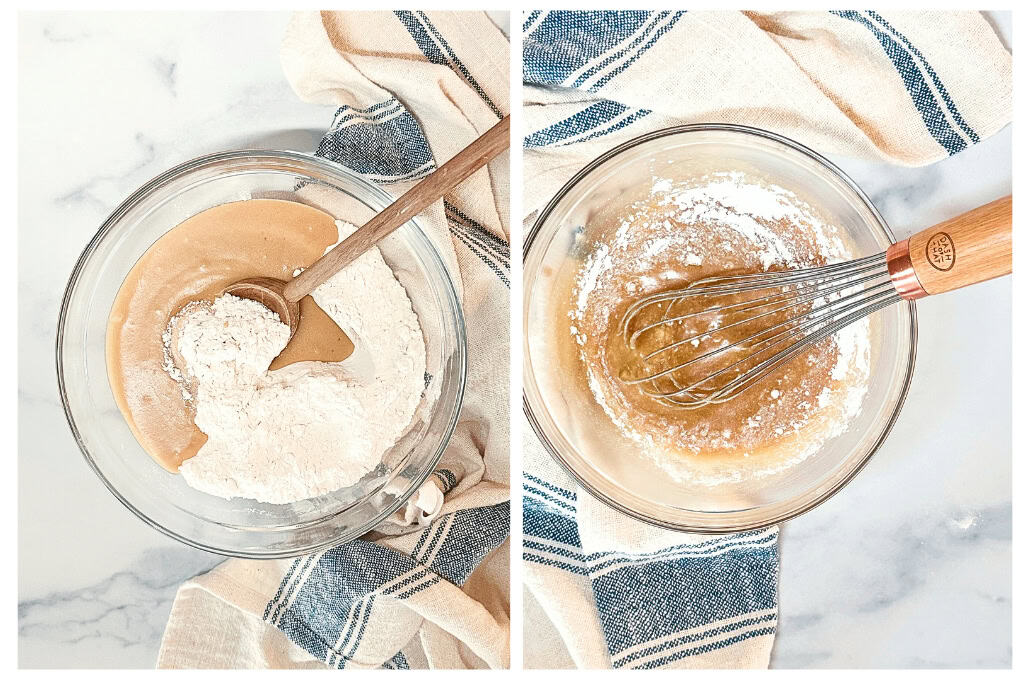
Step 6
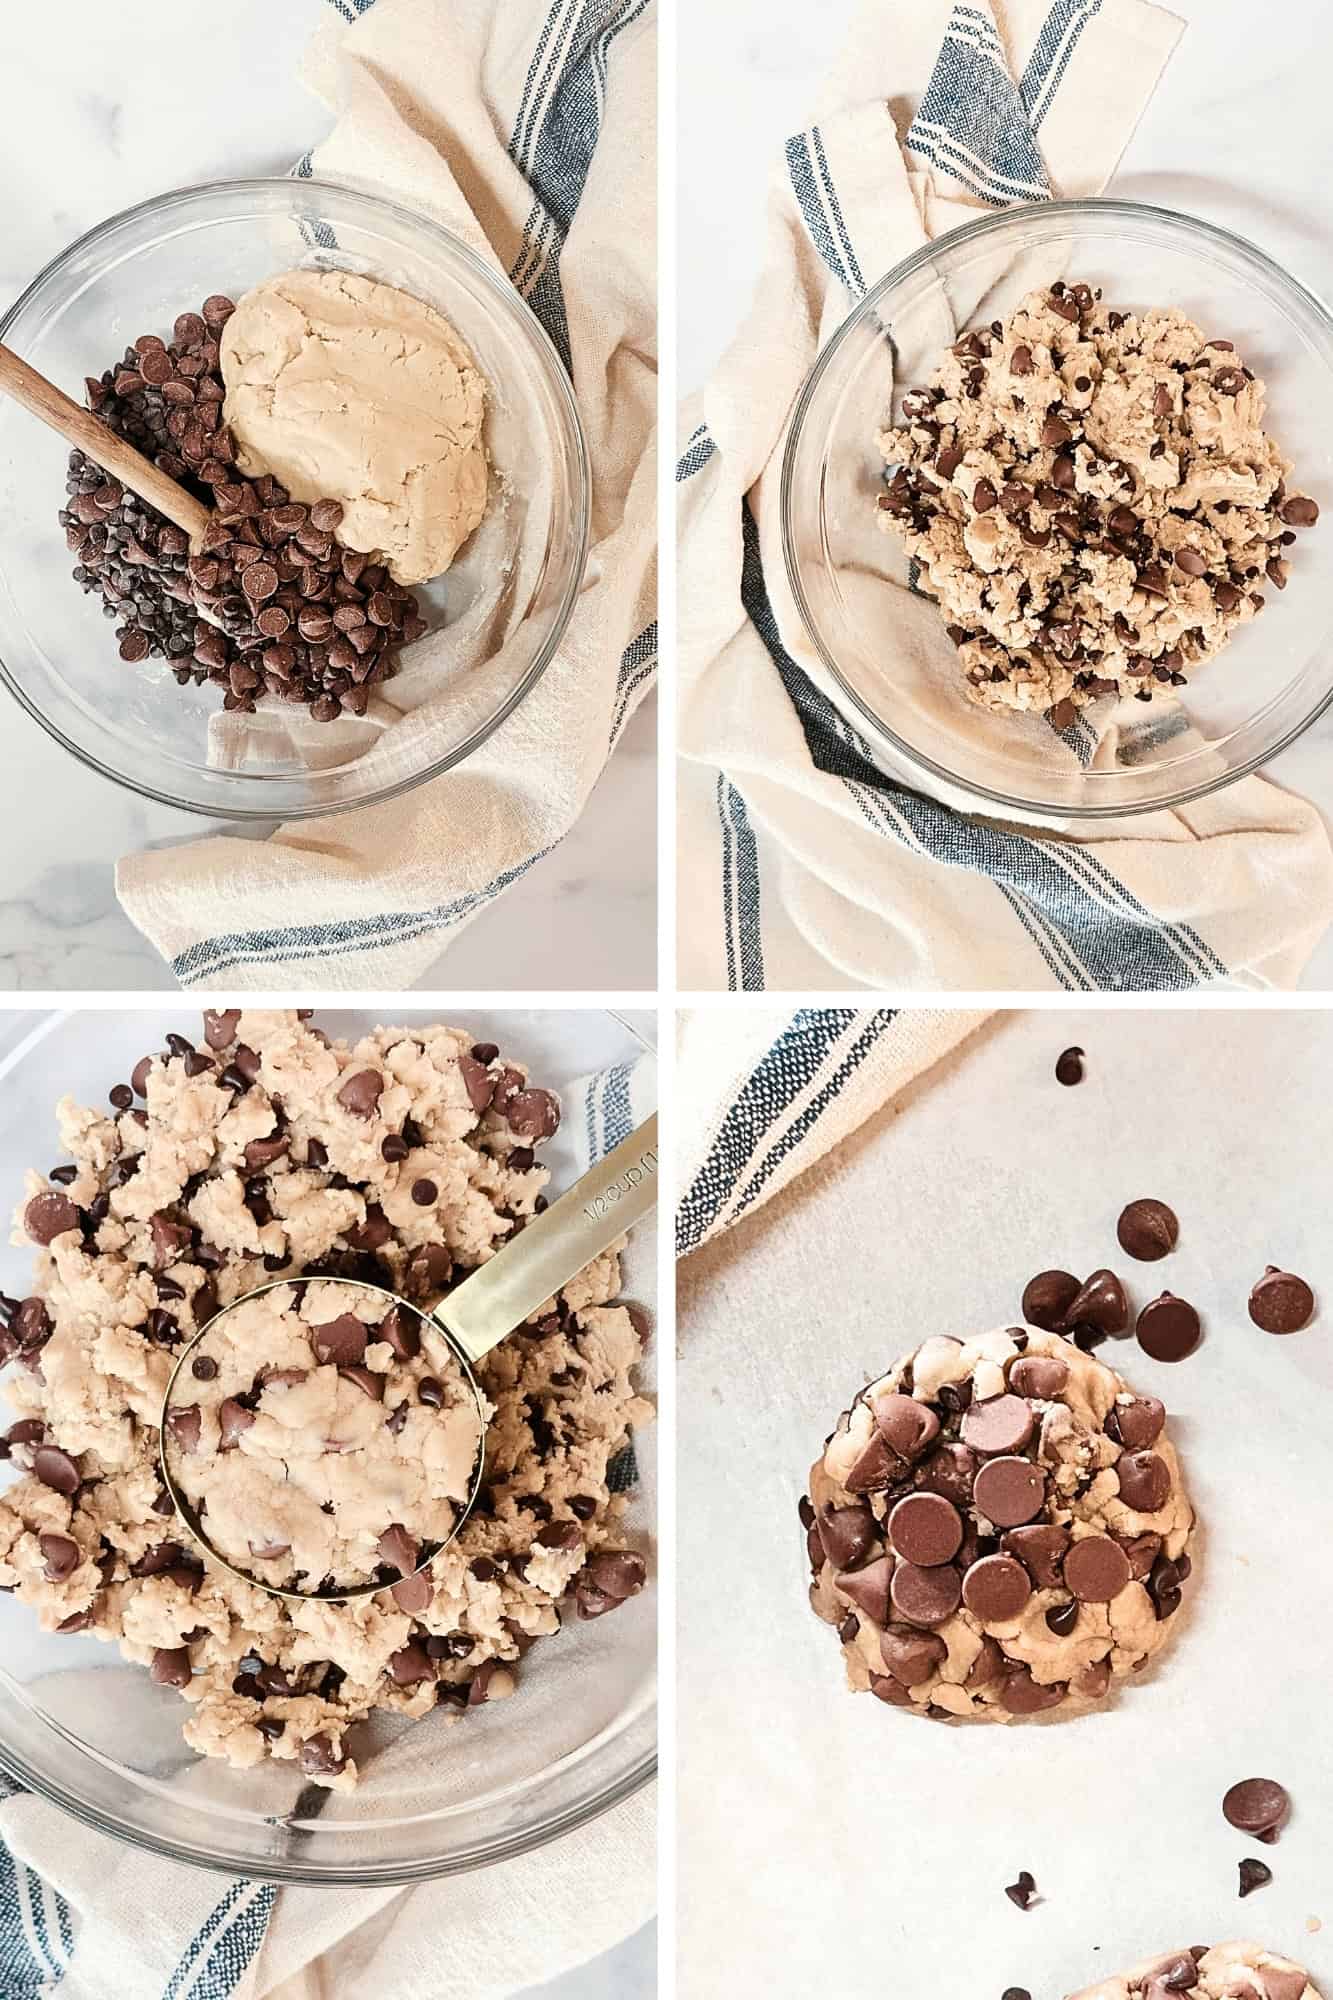
Fold in the Chocolate Chips: Gently fold in 1 ¾ cups of the chocolate chip mixture. Reserve the remaining chips for pressing on top of the cookies later.
Step 7
Shape the Dough: Use a ½ cup measuring cup or cookie scoop to divide the dough into 5-6 large portions. Shape each portion into a ball and place them on the prepared baking sheets, spacing them about 3 inches apart.
Step 8
Add More Chocolate Chips: Press the remaining chocolate chips onto the tops and sides of the cookie dough balls, flattening them slightly to about 1 ½ inches thick. Make sure not to press any chocolate chips on the bottom of the dough balls, as they can burn during baking.
Step 9
Chill the Dough: Place the cookie dough in the refrigerator for at least 1 hour. This helps the cookies hold their shape and enhances the flavor. If you don’t have enough space in your fridge for an entire baking sheet, you can chill the cookie dough balls on a plate and transfer them to the baking sheets after chilling. Preheat your oven to 325 while the dough is chilling.
Step 10
Bake the Cookies: Bake the cookies for 15-20 minutes, or until the edges are golden brown and the centers are just set. If you like soft cookies, avoid overbaking them. Let the cookies cool on the baking sheets for 5 minutes, then transfer them to a wire rack to cool completely.

Recipe Tips
- Don’t skip chilling the dough! Chilling the dough for at least an hour is crucial to prevent the cookies from spreading too much while baking. It also helps develop the flavor of the cookies. If you’re in a rush, you can chill the dough for a minimum of 30 minutes, but an hour is ideal.
- Don’t overmix the dough. Overmixing can result in tough cookies. Stir just until the flour is incorporated, and you’re good to go.
- Every oven is a little different, so start checking the cookies around the 15-minute mark. You want them to be just set in the middle for that soft, gooey texture.
- Be sure to let the butter cool to room temperature after melting. If the butter is too hot, it can melt the sugar and affect the texture of your cookies.
Be sure to save this recipe to your favorite Pinterest board for later.
FAQs
What if I don’t have cake flour?No worries! You can make your own cake flour substitute by measuring 1 cup of all-purpose flour, removing 2 tablespoons, and replacing them with 2 tablespoons of cornstarch.
Can I use different types of chocolate chips?Of course! Dark chocolate, white chocolate, or even peanut butter chips would be great variations. Feel free to get creative.
Why are my cookies spreading too much?This can happen if the dough isn’t chilled long enough, or if the butter is too warm when mixed. Be sure to chill the dough for at least an hour, and let the butter cool to room temperature before combining with the other ingredients.
Can I freeze the cookie dough?Yes! Just form the dough balls, place them on a baking sheet, and freeze until solid. Then transfer them to a freezer-safe bag or container. When you’re ready to bake, just add an extra minute or two to the baking time, straight from the freezer.
How should I store these cookies?Store the cookies in an airtight container at room temperature for up to 3 days. You can also can freeze the cookies in a freezer-safe bag or container for up to 3 months.
Can I make smaller cookies?Yes, just decrease the baking time to around 10-12 minutes, keeping an eye on them so they don’t overbake.
More Chocolate Chip Cookie Recipes To Try
- Copycat Crumbl Chocolate Chip Cookies
- Truffle Stuffed Chocolate Chip Cookies
- Bakery Style Chocolate Chip Cookies
- Doubletree Hotel Chocolate Chip Cookies
- Crispy Chewy Chocolate Chip Cookies
Gideon’s Bakehouse Chocolate Chip Cookies (Copycat Recipe)
Ingredients
- 1/2 cup butter melted and cooled
- 1 cup brown sugar packed
- 1 egg
- 1 teaspoon vanilla
- 1/2 teaspoon baking soda
- 1/2 teaspoon baking powder
- 1/2 teaspoon cornstarch
- 1/2 teaspoon salt
- 1 cup cake flour
- 1 cup all-purpose flour
- 1 1/2 cups chocolate chips milk or semi-sweet
- 1 cup mini chocolate chips
Instructions
- Line 2 large baking sheets with parchment paper; set aside.
- In a medium bowl, combine the 1 1/2 cups chocolate chips and 1 cup mini chocolate chips; set aside.
- In a large, microwave safe bowl, melt 1/2 cup butter. Let cool to room temperature, at least 10 minutes.
- When the butter is cool, whisk in the 1 cup brown sugar until smooth. Add 1 egg and 1 teaspoon vanilla to the bowl and stir until completely smooth. Stir in 1/2 teaspoon baking soda, 1/2 teaspoon baking powder, 1/2 teaspoon cornstarch and 1/2 teaspoon salt.
- Stir in the cake flour, followed by the all-purpose flour. Be careful no to overmix the dough. Fold in 1 3/4 cups of the chocolate chip mixture.
- Use a 1/2 cup measurer to divide the dough into 5-6 equal portions. Shape each portion into a ball and place on the prepared baking sheets, 3 inches apart. Press the remaining chocolate chips onto the top and sides of the cookie dough balls, flattening the cookies as you press to about 1 1/2 inch thickness. Don't press chocolate chips on the bottom of the cookie–they will burn.
- Place the baking sheets in the refrigerator for one hour. If you don't have room for the cookie sheets in your refrigerator, place the cookies on a plate and transfer to the baking sheets after chilling. While the cookies chill, preheat the oven to 325 degrees.
- Bake for 15-20 minutes, or until cookies are just set in the middle. For soft cookies, do not overbake. Allow the cookies to cool on the baking sheets for 5 minutes, then transfer to wire racks to cool completely.
Video
*As an Amazon Associate I earn from qualifying purchases. I get commissions for purchases made through links in this post.


3 comments
Anita
Hi. I made these last night. Excellent. The only problem I had was having to work to get as many chips as needed to adhere to cookie. The pics I’ve seen of these show virtually complete coverage. I was able to press in a lot, but the dough wasn’t sticky so they’d adhere easily. Baking wise, I don’t think the dough should be less dense; now, a day later, the texture is great. Flavor different enough to make it worth the effort. Thanks so much.
Danelle
I sometimes struggle getting enough chips to stick as well. I save everything that falls off, and then pile it on the cookies when they come out of the oven so they melt in a little bit. Hope that helps!
Anita
That’s a great idea. I’ll try that. Thanks.